

How to create a hand-tied flower bouquet
15th Sep 2023
Did you know, Hand–Tied Bouquets are very popular, and easy to
make. Turning a posy of flowers in to a neat bouquet is a life skill worth having!
Start of with your tools! Such a a pair of clippers and stem cleaner, also have your ribbon ready to tie them off and some pretty decor tissue or even brown paper.
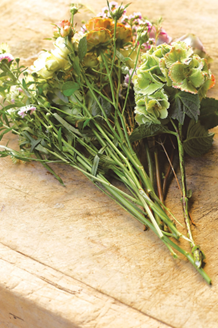
1. Prep your stems
First, snip the stems by about one inch, then lay your flowers out in groups. This makes it easier when you arrange your
bouquet. You can also strip some of the foliage off the lower parts of the stems, which makes it cleaner when you come
to group them all together in your hand later.
2. Select the focal point of your bouquet
Grab a real showstopper, such as a rose, and then pick a fluffier flower or a piece of foliage. Hold them in one hand. Now add another type of stem and lay it on top of your flowers on a diagonal, under your thumb. Give the bouquet a little turn with your other hand. This insert-and-twist technique forms the basis of ‘spiralling’ used by florists. You’ll use this to form the full bouquet.
3. Keep spiralling different textures and styles
Continue to lay single stems on a diagonal and keep twisting the stems in your hand until the bouquet is full. By doing
this, you are locking them into the bouquet and building out from your central flower. You can check how the arrangement
is coming along by looking down at it every few stems. As your bouquet grows, it will get easier to hold the stems in
your hand.
Top tip! Try not to squeeze your stems too hard, as this may crush the stems. Relax!
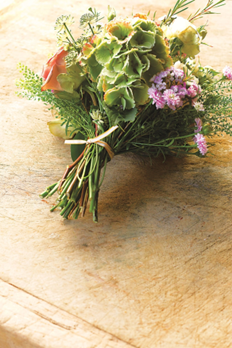
4. Once the bouquet is full, adjust your stems
Holding the bouquet fairly loosely allows you to wiggle any stems into place if you want to alter the arrangement. Check if any have slipped down while you've been arranging and pull them back into place. Sometimes it's easier to go to the bottom of the stem and wiggle them up. You can also pull out and swap any stems of foliage that might look better on the other side. Play around and spend a moment perfecting your blooms!
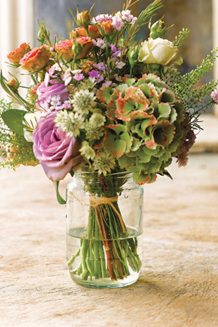
5. Tie off your bouquet with string & Trim your stems to the same length!
Trim them straight, so they
are all the same length when you put them in a vase.
8. Wrap your bouquet
Put your bouquet in the centre of one of the folded pieces of brown paper. The top flowers should be in line with the
zig-zag shape, and the stems should be peeking out of the bottom. Fold it in on both sides, like a cone, squeezing the
paper above where the string is. Flip it over and repeat with the second piece of paper.
9. Secure it with string and ribbon
Cut another length of string and tie in your brown paper (be careful not to squeeze too tight!) Tie it off and give it a
knot. As a finishing touch you can add some nice long ribbon and tie it in a bow.
Cut another length of string and tie in your brown paper (be careful not to squeeze too tight!) Tie it off and give it a
knot. As a finishing touch you can add some nice long ribbon and tie it in a bow.